开源图形库Assimp

前言

引用一段介绍

Assimp,开源图形库(Open Asset Import Library)是一种便携式的可支持读取多种模型资源的开源库,它可以用统一的方式输入各种格式的3D模型,而其最新版本能实现输出3D模型的文件,因此该资源库也作为通用的3D模型转换器。assimp旨在提供用于游戏引擎实时渲染系统的一种完整的资源转换管道,但它不局限于这个目的,但在过去已被广泛应用。Assimp是用C++编写的,可以基于C语言应用程序编程接口或者绑定其它其它语言,如C#、.net、Python。为了进一步处理资源,Assimp加载了输入的模型格式为一个简单的数据结构,这个功能是由后处理工具加强的,包括一些常用的操作比如计算正常和切向量。

assimp是一种库,它主要用来加载和处理各种数据格式的几何场景。它主要针对的是那些支持节点层次、静态表层网格、材料、具有质感的动画和潜在纹理数据。assimp库不是为了提高速度而设计的,它最重要的用处就是,将每一个不同来源的资源导入并且在每一次的加载中以一种特殊的格式将它方便、快捷的存储起来。assimp也能够运用各种后处理步骤导入相应的数据,如转换为索引网格,计算法线和切线/双切线或转换从右手到左手坐标系统。assimp目前支持以下文件格式(请注意,一些装载机缺乏格式的一些特点,因为有些文件格式包含assimp不支持的数据,所以会需要很多的转换工作,而因此缺乏适当的格式规范并没有实现)

本文主要对库本身的主要内容进行一波分析, 然后顺手封装成UE的蓝图插件

录制_2021_03_22_10_06_11_380

github官方

支持格式

Collada ( .dae;.xml )
Blender ( *.blend ) 3
Biovision BVH ( *.bvh )
3D Studio Max 3DS ( *.3ds )
3D Studio Max ASE ( *.ase )
Wavefront Object ( *.obj )
Stanford Polygon Library ( *.ply )
AutoCAD DXF ( *.dxf )
IFC-STEP, Industry Foundation Classes ( *.ifc )
Neutral File Format ( *.nff )
Sense8 WorldToolkit ( *.nff )
Valve Model ( .smd,.vta ) 3
Quake I ( *.mdl )
Quake II ( *.md2 )
Quake III ( *.md3 )
Quake 3 BSP ( *.pk3 ) 1
RtCW ( .mdc )
Doom 3 ( .md5mesh;.md5anim;
.md5camera )
DirectX X ( *.x ).
Quick3D ( *.q3o;q3s ).
Raw Triangles ( .raw ).
AC3D ( *.ac ).
Stereolithography ( *.stl ).
Autodesk DXF ( *.dxf ).
Irrlicht Mesh ( .irrmesh;.xml ).
Irrlicht Scene ( .irr;.xml ).
Object File Format ( *.off ).
Terragen Terrain ( *.ter )
3D GameStudio Model ( *.mdl )
3D GameStudio Terrain ( .hmp )
Ogre (
.mesh.xml, *.skeleton.xml, *.material)3
Milkshape 3D ( *.ms3d )
LightWave Model ( *.lwo )
LightWave Scene ( *.lws )
Modo Model ( *.lxo )
CharacterStudio Motion ( *.csm )
Stanford Ply ( *.ply )
TrueSpace ( *.cob, *.scn )2
XGL ( *.xgl, *.zgl )
支持以下格式的导出:
Collada(.dae)
Wavefront Object(.obj)
Stereolithography(.stl)
Stanford Polygon Library(.ply)

编译

一般情况建议自己通过cmake编译assimp源文件, 部分情况可能需要用到win32的链接库(我在学习opengl用的是win32);

这里下载assimp最新版本的源文件

image-20210618151217958

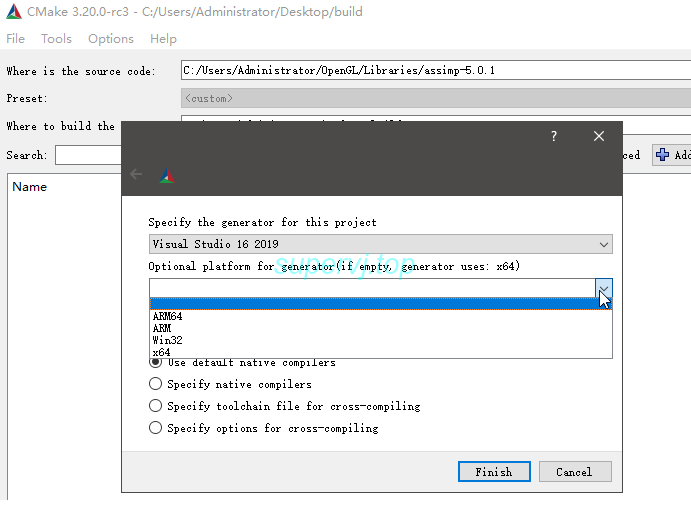
cmake生成项目之前记得选择需要的系统版本

然后就到vs内编译

image-20210618151318217

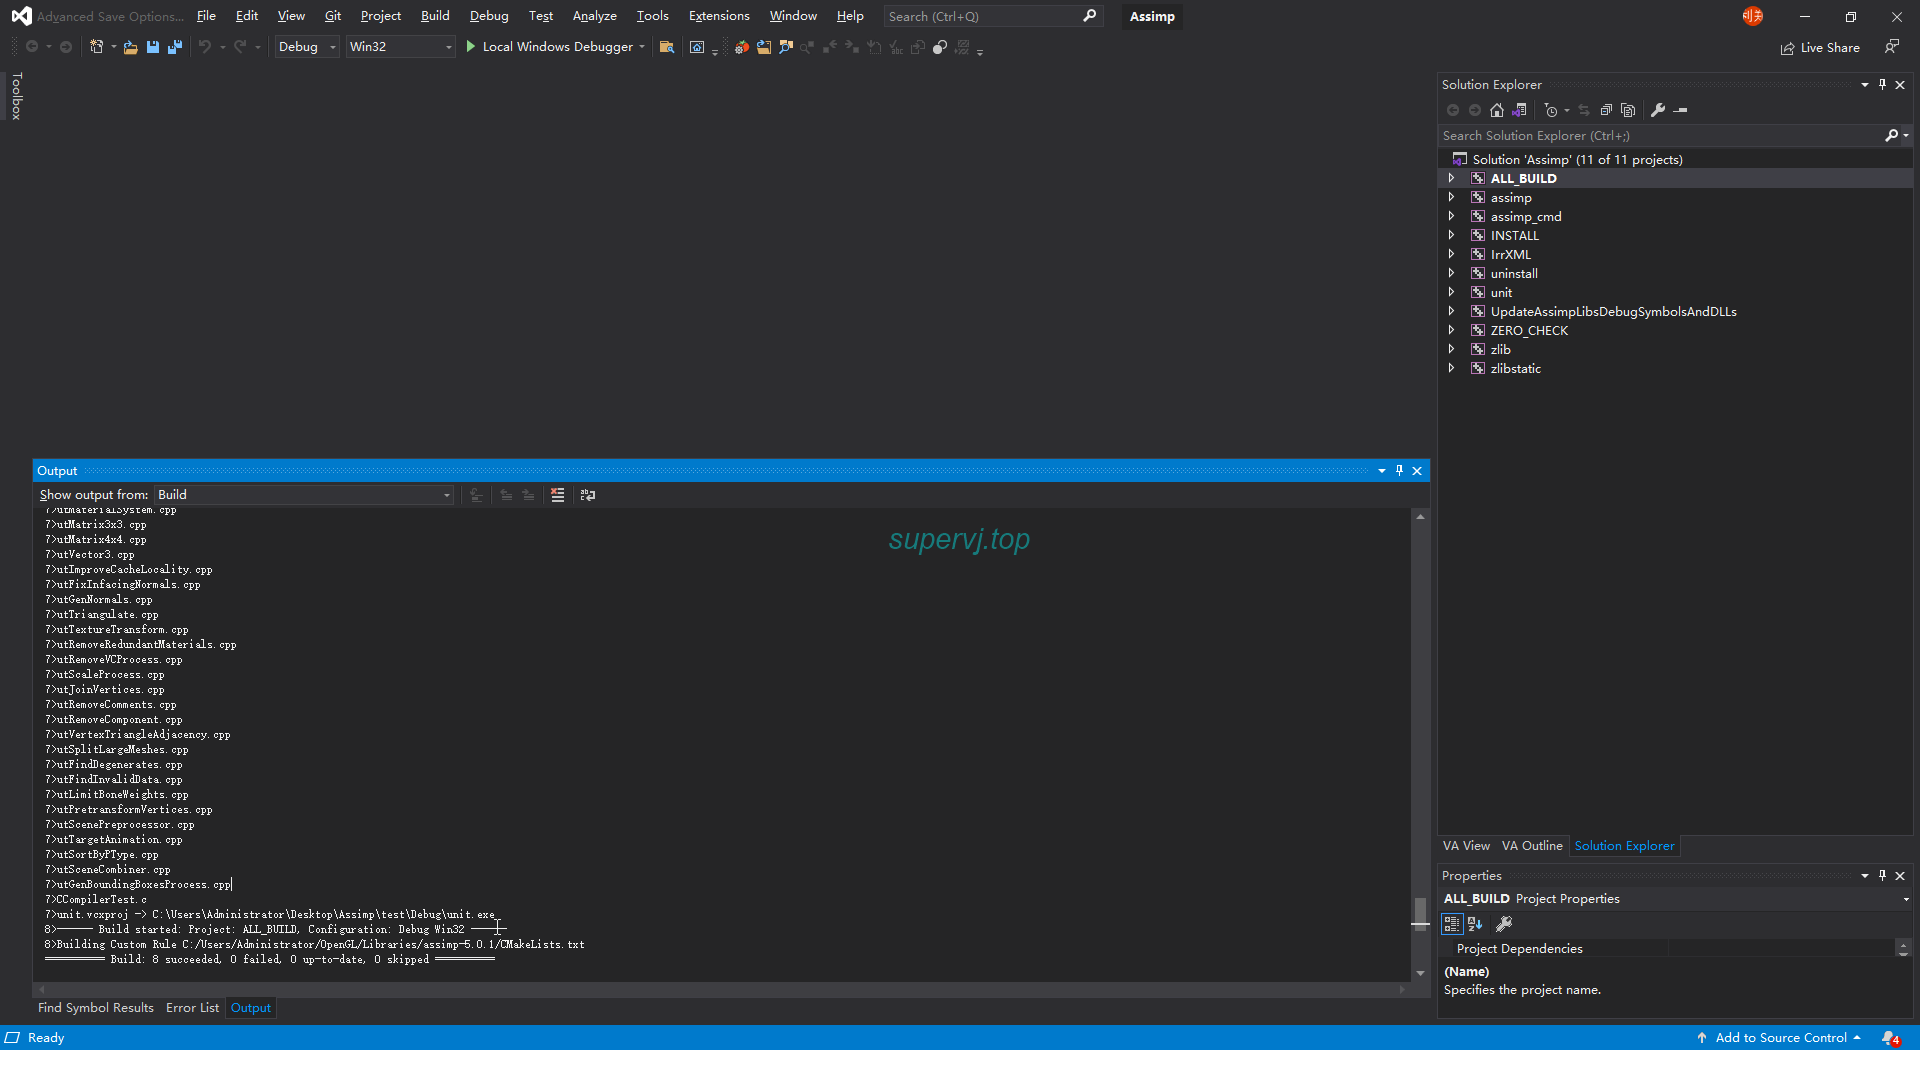
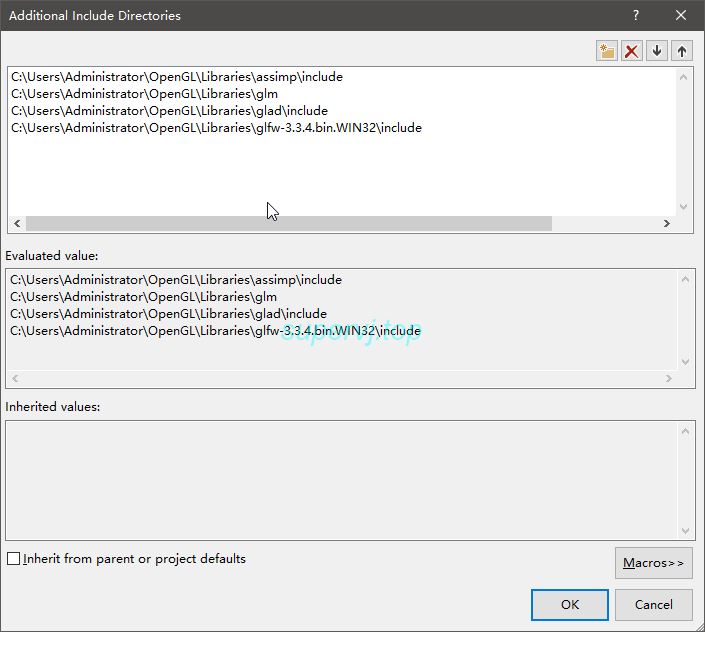
完成以后把assimp项目内的include文件复制到所需要的第三方库include内

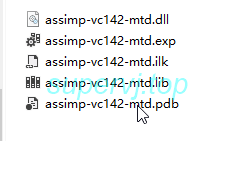
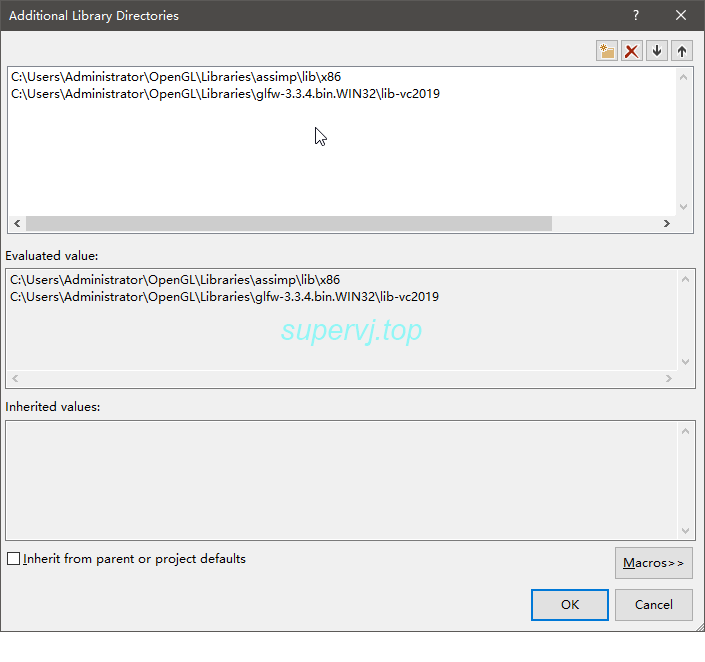
然后找到\code\Debug目录,把里面的文件复制到第三方库的lib文件夹中作为链接库文件

image-20210618151624413

  • UE4

对于UE, 那么需要在buid.cs文件中添加第三方库的包含

1
2
3
4
PublicIncludePaths.AddRange(
new string[] {
Path.Combine(ThirdPartyPath, "assimp/include"),
}
1
2
3
4
5
6
7
8
9
10
11
12
13
14
15
16
17
18
19
20
21
22
23
24
25
26
27
28
if ((Target.Platform == UnrealTargetPlatform.Win64) || (Target.Platform == UnrealTargetPlatform.Win32))
{
string PlatformString = (Target.Platform == UnrealTargetPlatform.Win64) ? "Win64" : "Win32";
PublicAdditionalLibraries.Add(Path.Combine(ThirdPartyPath, "assimp/lib",PlatformString, "assimp-vc140-mt.lib"));


string BinariesDirectory = Path.Combine(ProjectDirectory, "Binaries", PlatformString);
string SourceFile = Path.Combine(ThirdPartyPath, "assimp/bin", PlatformString, "assimp-vc140-mt.dll");
string TargetFile = Path.Combine(BinariesDirectory, "assimp-vc140-mt.dll");


if (!Directory.Exists(BinariesDirectory))
{
Directory.CreateDirectory(BinariesDirectory);
}
if(File.Exists(SourceFile) && !File.Exists(TargetFile))
{
File.Copy(SourceFile, TargetFile, false);
}

RuntimeDependencies.Add(Path.Combine(BinariesDirectory, "assimp-vc140-mt.dll"));
}
else if(Target.Platform == UnrealTargetPlatform.Mac)
{
string PlatformString = "Mac";
PublicAdditionalLibraries.Add(Path.Combine(ThirdPartyPath, "assimp/lib",PlatformString, "libassimp.4.1.0.dylib"));
}
  • windows(openGl项目)

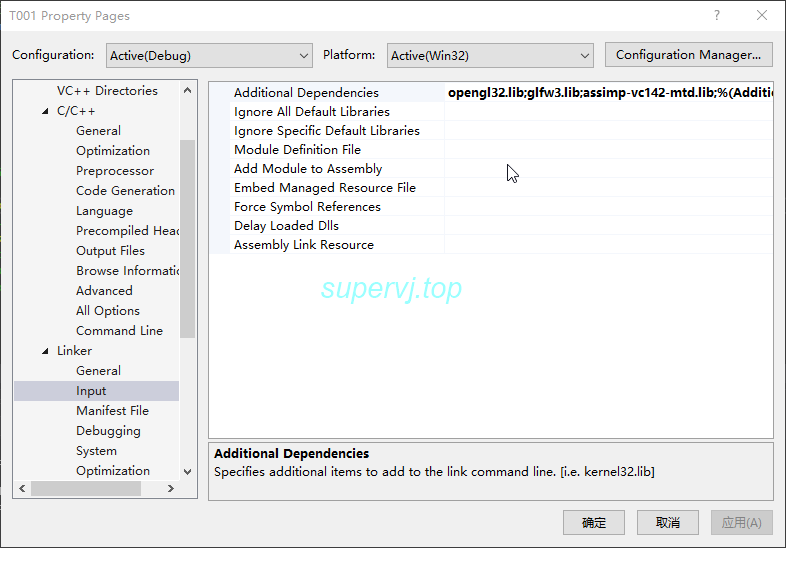
在include和lib目录添加对应的目录, 在链接输入中填上assimp-vc142-mtd.lib, 否则我这边会出现GetTextureCount()之类的函数出现奇怪的连接错误

image-20210618151910929

image-20210618151925599

image-20210618151950225

数据结构

20200630154409945

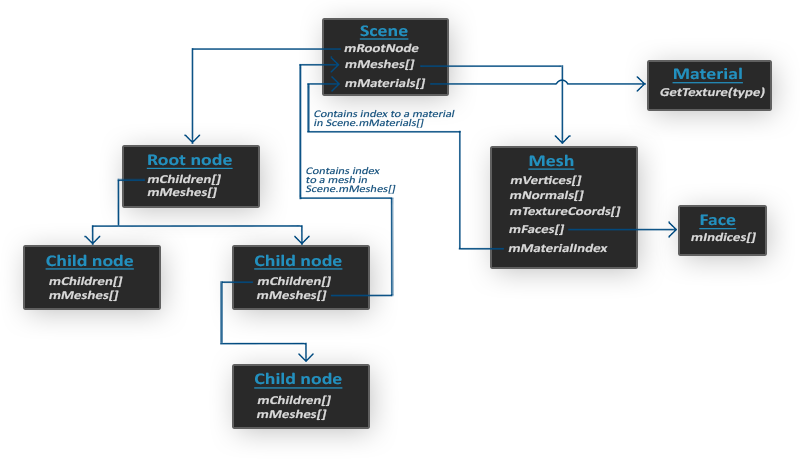
引用OpenGL的图片, Assimp'从文件读取数据以后的数据结构就如上图所示, 所有数据都包含在aiScene指针内

image-20210319180134014

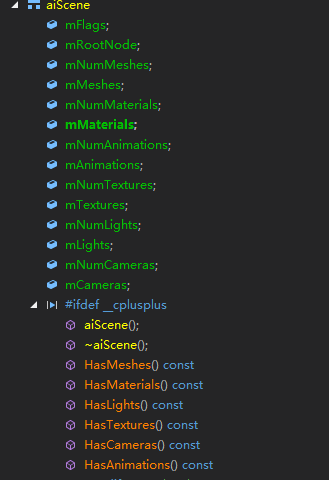
从此图可以大概看到aiScene内有哪些成员变量和函数,后面我们从实例中逐步分析

导入数据

1
2
3
4
Assimp::Importer Importer;//导入器
const aiScene* scene = Importer.ReadFile(FilePath, 配置参数);


如下是常用的配置参数, 点这里查看所有参数

  • aiProcess_SplitLargeMeshes : 将比较大的网格分割成更小的子网格,如果你的渲染有最大顶点数限制,只能渲染较小的网格,那么它会非常有用
  • aiProcess_OptimizeMeshes: 和上个选项相反,它会将多个小网格拼接为一个大的网格,减少绘制调用从而进行优化。
  • aiProcess_FlipUVsv: 沿着y方向翻转纹理坐标,这在渲染quake模型时候是必须的
  • aiProcess_SortByPType: 将不同图元放置到不同的模型中去,图片类型可能是点、直线、三角形等
  • aiProcess_JoinIdenticalVertices :自动合并相同的顶点
  • aiProcess_GenSmoothNormals :如果原始顶点没有法向数据,Assimp会为顶点产生法向数据
  • aiProcess_CalcTangentSpace:自动计算切线和副法线
  • aiProcess_Triangulate :自动将四边形面转换为三角面
  • aiProcess_MakeLeftHanded: 使用作手坐标系

获取模型信息

模型的基本信息保存在 aiScene.mMeshes[]数组中,每个aiNode内也保存了每个aiNode所对应的模型信息

我们先声明一个USTRUCT来保存相应数据

1
2
3
4
5
6
7
8
9
10
11
12
13
14
15
16
17
18
19
20
21
22
23
24
25
26
27
28
USTRUCT(BlueprintType)
struct FMeshData
{
GENERATED_BODY()
FMeshData()
{}
public:
UPROPERTY(BlueprintReadWrite, EditAnywhere, Category = "MeshData")
TArray<FVector> Vertices;

UPROPERTY(BlueprintReadWrite, EditAnywhere, Category = "MeshData")
TArray<int32> Triangles;

UPROPERTY(BlueprintReadWrite, EditAnywhere, Category = "MeshData")
TArray<FVector> Normals;

UPROPERTY(BlueprintReadWrite, EditAnywhere, Category = "MeshData")
TArray<FVector2D> UV0;

UPROPERTY(BlueprintReadWrite, EditAnywhere, Category = "MeshData")
TArray<FLinearColor> VertexColors;

UPROPERTY(BlueprintReadWrite, EditAnywhere, Category = "MeshData")
TArray<FProcMeshTangent> Tangents;

UPROPERTY(BlueprintReadWrite, EditAnywhere, Category = "MeshData")
FTransform RelativeTransform;
};

然后通过一个方法获取对应aiNode的模型数据

1
2
3
4
5
6
7
8
9
10
11
12
13
14
15
16
17
18
19
20
21
22
23
24
25
26
27
28
29
30
31
32
33
34
35
36
37
38
39
40
41
42
43
44
45
46
47
48
49
50
51
52
53
54
55
56
57
58
59
60
61
62
63
64
65
66
67
68
69
70
71
72
73
void FindMeshData(const aiScene* scene, aiNode* node, FLoadedMeshData& outLoadedMeshData)
{
if (scene == nullptr || node == nullptr)
{
UE_LOG(RIELog, Warning, TEXT("FindMeshData Failed : invalid scene or node!"));
return;
}

for (unsigned i = 0; i < node->mNumMeshes; ++i)
{
UE_LOG(RIELog, Log, TEXT("FindMeshData : %s"), node->mName.C_Str());

/*
此成员保存了node对应mesh的序号
unsigned int* mMeshes;
*/
int meshesIdx = *node->mMeshes;
aiMesh* mesh = scene->mMeshes[meshesIdx];
FMeshData& meshData = outLoadedMeshData.meshData[meshesIdx];

//conv aiMatrix4x4 to FTransform
aiMatrix4x4 trans = node->mTransformation;
FMatrix matrix;
matrix.M[0][0] = trans.a1; matrix.M[0][1] = trans.b1; matrix.M[0][2] = trans.c1; matrix.M[0][3] = trans.d1;
matrix.M[1][0] = trans.a2; matrix.M[1][1] = trans.b2; matrix.M[1][2] = trans.c2; matrix.M[1][3] = trans.d2;
matrix.M[2][0] = trans.a3; matrix.M[2][1] = trans.b3; matrix.M[2][2] = trans.c3; matrix.M[2][3] = trans.d3;
matrix.M[3][0] = trans.a4; matrix.M[3][1] = trans.b4; matrix.M[3][2] = trans.c4; matrix.M[3][3] = trans.d4;
meshData.RelativeTransform = FTransform(matrix);


//vertex
for (unsigned j = 0 ; j < mesh->mNumVertices; ++j)
{

FVector vertex = FVector(mesh->mVertices[j].x, mesh->mVertices[j].y, mesh->mVertices[j].z);
vertex = meshData.RelativeTransform.TransformFVector4(vertex);
meshData.Vertices.Push(vertex);

//normal
if (mesh->HasNormals())
{
FVector normal = FVector(mesh->mNormals[j].x, mesh->mNormals[j].y, mesh->mNormals[j].z);
meshData.Normals.Push(normal);
}
else
{
meshData.Normals.Push(FVector::ZeroVector);
}

//UV
if (mesh->HasTextureCoords(0))
{
FVector2D uv = FVector2D(mesh->mTextureCoords[0][j].x, mesh->mTextureCoords[0][j].y);
meshData.UV0.Push(uv);
}

//tangent
if (mesh->HasTangentsAndBitangents())
{
FProcMeshTangent tangent = FProcMeshTangent(mesh->mTangents[j].x, mesh->mTangents[j].y, mesh->mTangents[j].z);
meshData.Tangents.Push(tangent);
}

if (mesh->HasVertexColors(0))
{
FLinearColor color = FLinearColor(mesh->mColors[0][j].r, mesh->mColors[0][j].g,
mesh->mColors[0][j].b,mesh->mColors[0][j].a);
meshData.VertexColors.Push(color);
}
}
}

}

然后通过一个递归方法来获取所有的节点模型信息

1
2
3
4
5
6
7
8
void FindMeshDataRecursive(const aiScene* scene, aiNode* node, FLoadedMeshData& outLoadedMeshData)
{
FindMeshData(scene, node, outLoadedMeshData);
for (uint32 i = 0; i < node->mNumChildren; ++i)
{
FindMeshDataRecursive(scene, node->mChildren[i], outLoadedMeshData);
}
}

最后从递归得到的数据再得到顶点序号

1
2
3
4
5
6
7
8
9
10
11
12
for (uint32 i = 0; i < Scene->mNumMeshes; ++i)
{
//Triangle number
for (uint32 l = 0; l < Scene->mMeshes[i]->mNumFaces; ++l)
{
for (uint32 m = 0; m < Scene->mMeshes[i]->mFaces[l].mNumIndices; ++m)
{
out.meshData[i].Triangles.Push(Scene->mMeshes[i]->mFaces[l].mIndices[m]);
}
}
}
out.bSuccess = true;

测试

UE4Editor_AWsxBHcz2H

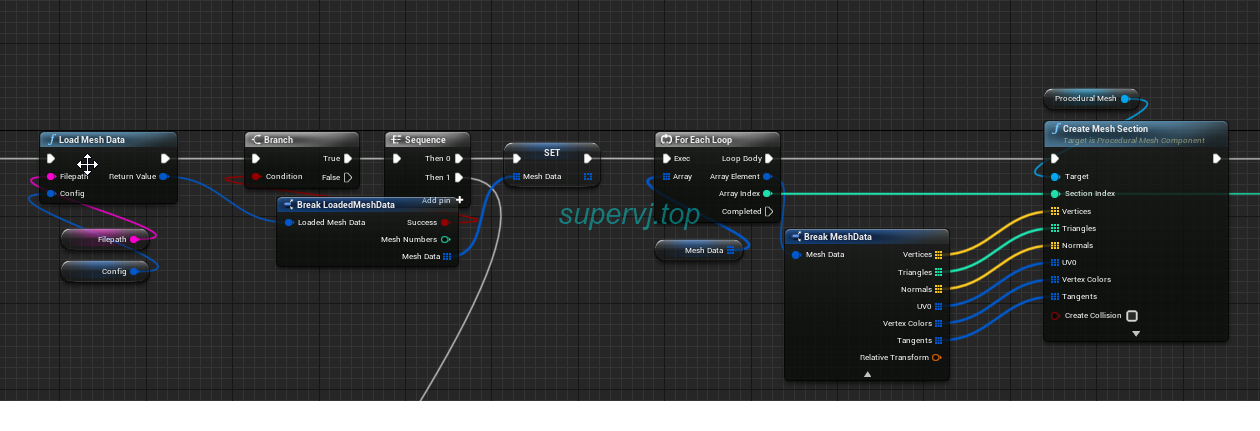
我们用ProceduralMesh正好可以创建出模型,如上图所示即可

获取材质信息

材质信息保存在aiScene.mMaterials中, 官方文档中说了可以获取是所有材质属性

下图截取一部分

chrome_A0rKxl2bTt

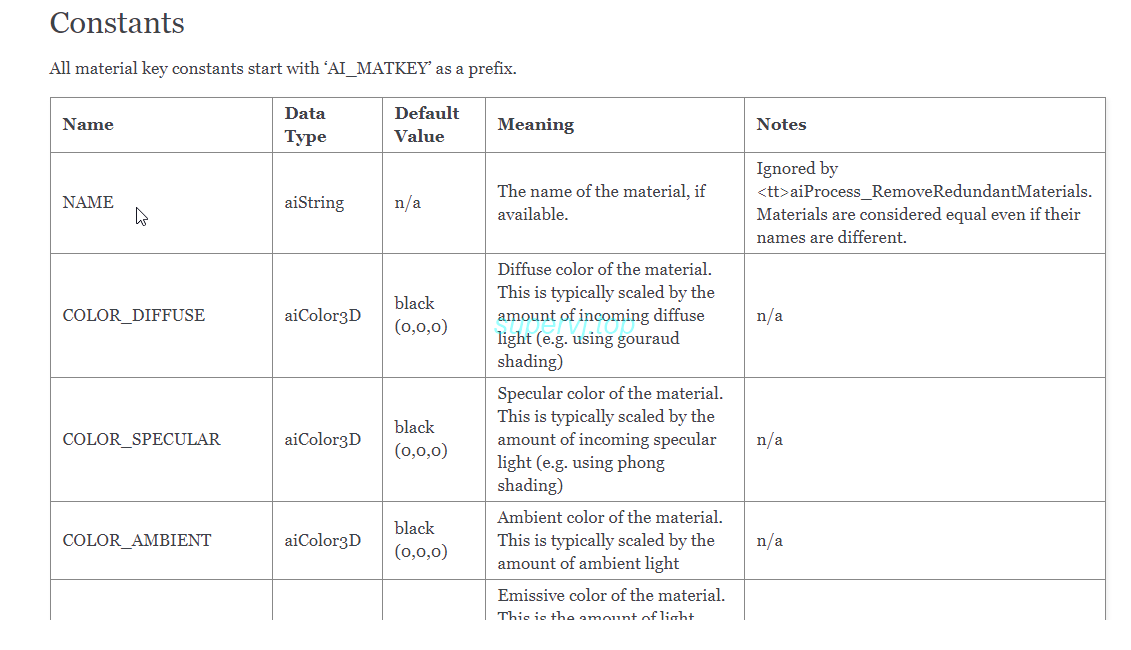
通过如下方式获取材质, 其中类型前面统一加上AI_MATKEY_

1
2
3
4
5
6
aiMaterial* mat = .....

// The generic way
if(AI_SUCCESS != mat->Get(<material-key>,<where-to-store>)) {
// handle epic failure here
}

又比如

1
2
aiColor3D color (0.f,0.f,0.f);
mat->Get(AI_MATKEY_COLOR_DIFFUSE,color);

所以我们就可以通过此封装UE库

但是考虑到各个类型的返回值不同, 我们就干脆一口气封装成K2Node泛型节点来方便使用,具体效果如下

录制_2021_03_22_10_06_11_380

对于这里图片的返回值的字符串表示的是路径信心, 但是这个还有个问题, 参考文档中的一段话

There are two cases:

  • The texture is NOT compressed. Its color data is directly stored in the aiTexture structure as an array of aiTexture::mWidth * aiTexture::mHeight aiTexel structures. Each aiTexel represents a pixel (or “texel”) of the texture image. The color data is stored in an unsigned RGBA8888 format, which can be easily used for both Direct3D and OpenGL (swizzling the order of the color components might be necessary). RGBA8888 has been chosen because it is well-known, easy to use and natively supported by nearly all graphics APIs.
  • This applies if aiTexture::mHeight == 0 is fulfilled. Then, texture is stored in a compressed format such as DDS or PNG. The term “compressed” does not mean that the texture data must actually be compressed, however the texture was found in the model file as if it was stored in a separate file on the harddisk. Appropriate decoders (such as libjpeg, libpng, D3DX, DevIL) are required to load theses textures. aiTexture::mWidth specifies the size of the texture data in bytes, aiTexture::pcData is a pointer to the raw image data and aiTexture::achFormatHint is either zeroed or contains the most common file extension of the embedded texture’s format. This value is only set if assimp is able to determine the file format.

我们一般情况下都是使用的注入PNG或者JPG等压缩格式的图片, 那么在获取图片信息的时候基本都是 上述第二种情况, 从返回的数据和路径信息都是不能直接使用的,需要借助其他工具来解析这些数据,此文就不讨论这个问题了

测试

3dsmax_fHQyk1D1Jg

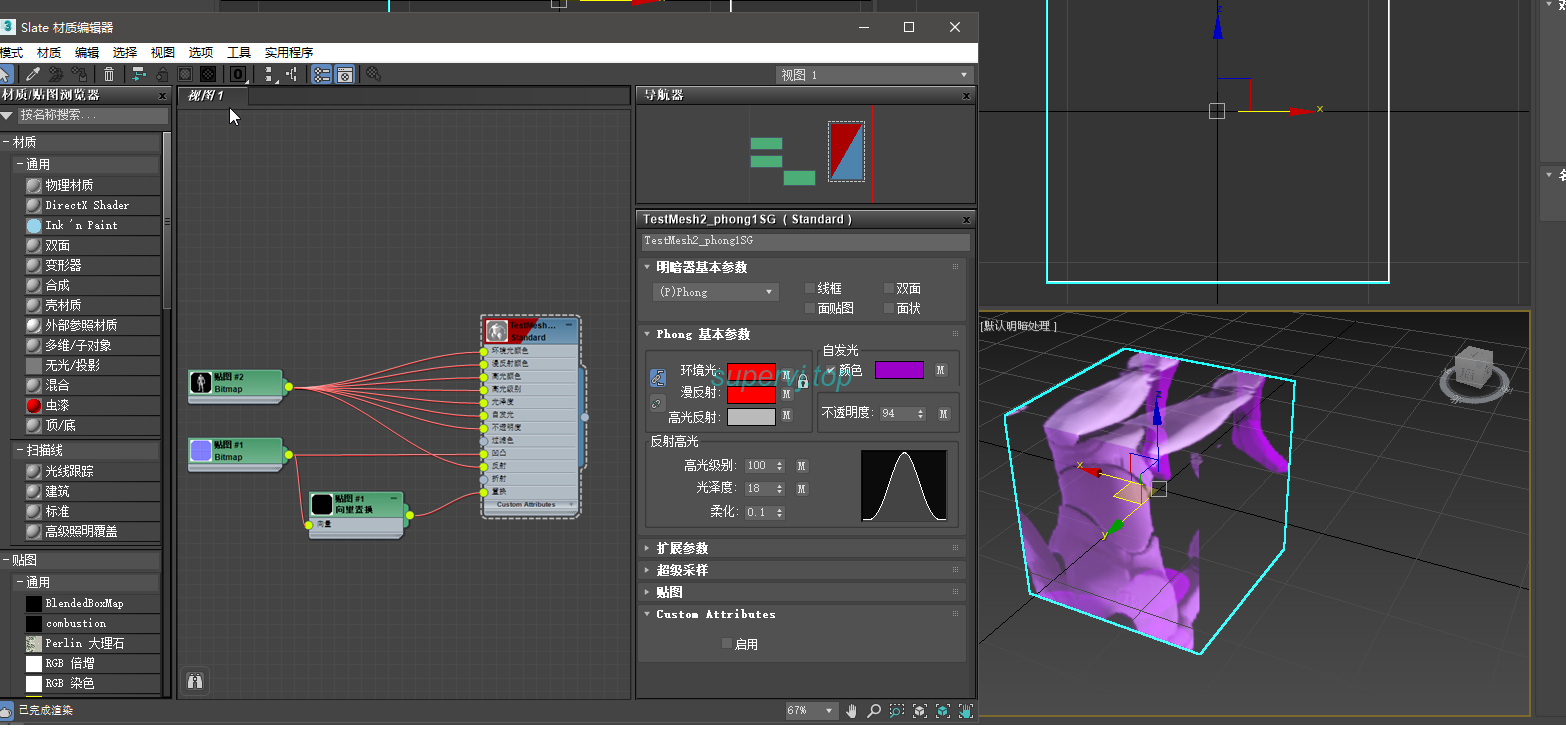
如上图, 在max内创建一个简单的box和材质,贴上一个简单的贴图
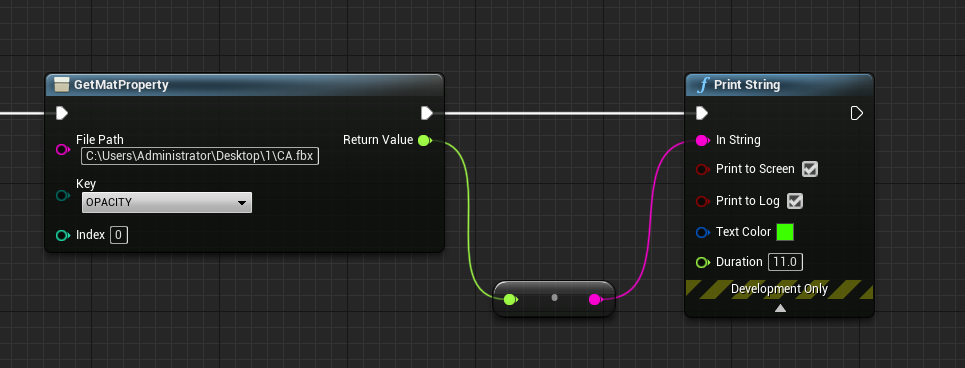
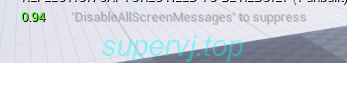
image-20210322104048429

UE4Editor_qdTxG1JLQB

打印得到opacity值为0.94