使用Hexo+GithubPages部署个人静态博客
使用静态博客有些日子了, 前阵子博客文件被手残折腾没了(还好文章有备份), 重新部署一下有点生疏了.
于是还是决定写一篇部署博客的文章重新记录一下部署流程
准备工作
- 手动百度搜索node.js下载并安装
- 下载并安装git
- 注册github账户
关于git和github的使用在另外一篇博客里有详细说明,点击这里
- 创建
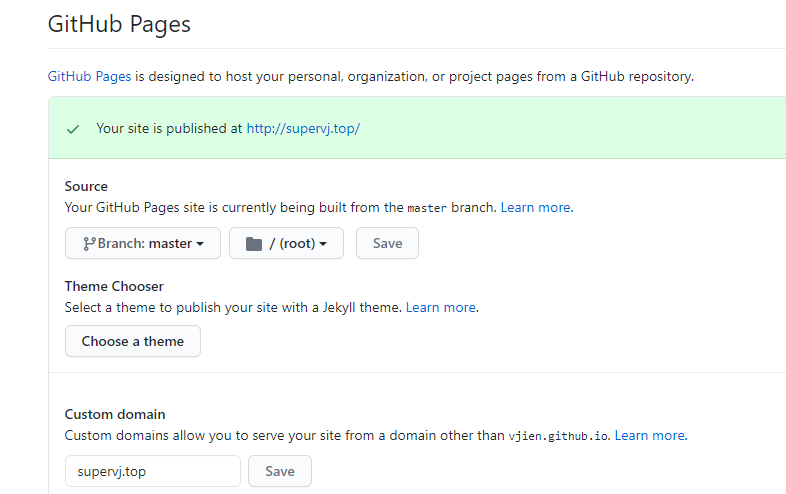
你的用户名.github.io的仓库,此仓库是用来保存博客文件的- 虽然非绝对必要但是强烈将以注册一个自己的域名,如阿里云;否则可能导致访问速度过慢或者无效
- 在setting中的
GitHubPages栏填写自己的域名
安装Hexo
GitBash模式下输入安装hexo
1 | $ npm install -g hexo |
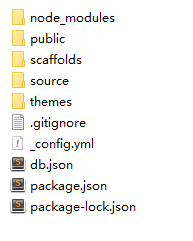
选择一个博客文件夹,输入如下代码初始化hexo环境
1 | $ hexo init |
初始化后在文件内会生成若干文件和文件夹,大致如下
部署Hexo
部署需要安装部署插件deployer
1 | npm install --save hexo-deployer-git |
安装过程可能会报警告, 我这边提示版本9.0过期什么的,不用理会,继续
hexo的部署一般只需要简单几个命令
1 | $ hexo clean --清理,一般修改配置以后需要执行 |
然后打开我们博客根目录下的_config.yml文件,此文件是博客的配置文件,需要区分的是在每一个主题内也有一个同名文件, 那个是主题自身的配置文件
把最下面的deploy信息修改为我们github的对应信息
1 | deploy: |
安装主题
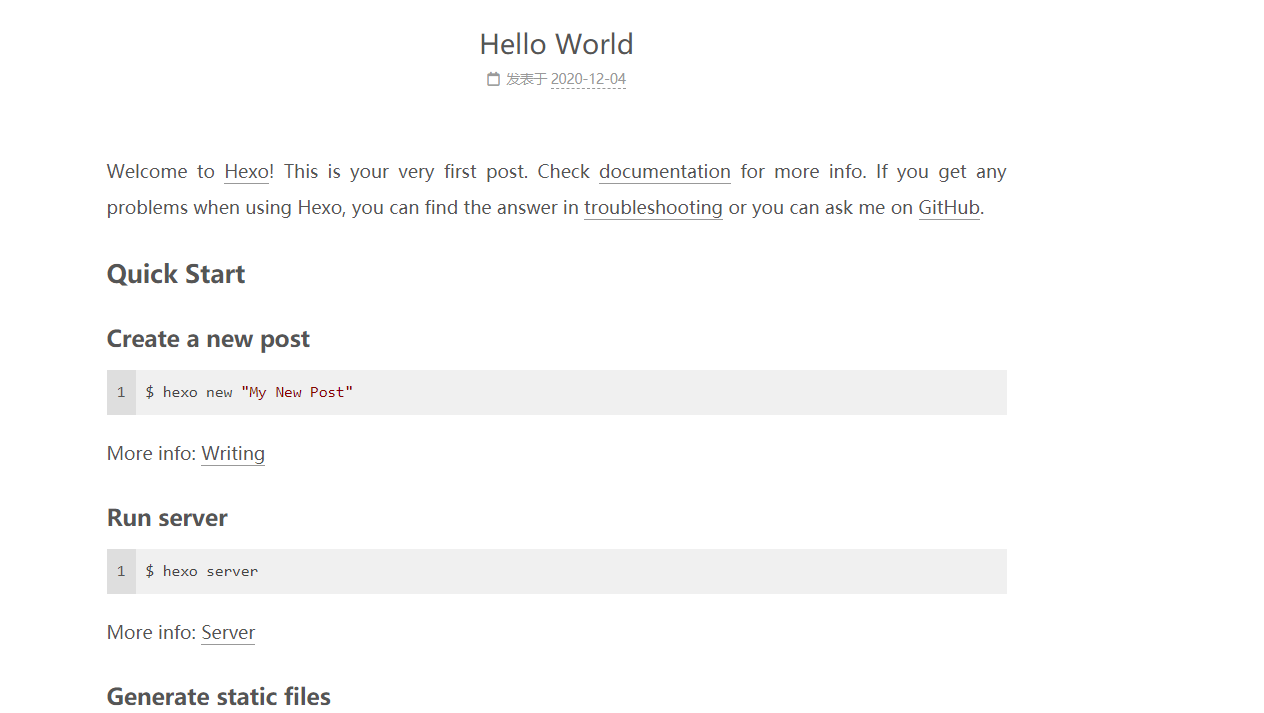
默认会有一个landscape主题,略丑
我们可以下载一个比较流行的主题如 next或者pure之类的
以next为例,clone目前最新的8.0版本
1 | $ git clone git@github.com:next-theme/hexo-theme-next.git themes/next |
打开博客配置文件,在主题设置的地方设置主题为next
1 | theme: landscape |
直接hexo s + localhost:4000预览
一切顺利!
基础配置
博客配置里面有一些比较重要的我们大概梳理一下
1 | title: 博客名称 |
1 | permalink: :year/:month/:day/:title/ #时间显示方式 |
打开文件夹source,里面的_posts内就是存放md格式的博客文件的
文档加密
安装插件
1 | npm install hexo-blog-encrypt |
- 在
/Hexo/_config.yml文件中添加内容:
1 | encrypt: |
然后在博客抬头部分加入如下
1 | password: ##密码 |
更新主题
1 | $ cd themes/next |
建议更新主题之前先备份一下整个博客文件, 因为主题升级可能导致部分功能出错,严重的话博客无法正常显示(本人亲测)
主题设置
主题风格选择
next主题内有4个风格,可以自己选择; 部分配置选项跟某些风格有冲突,需要注意
1 | # Schemes |
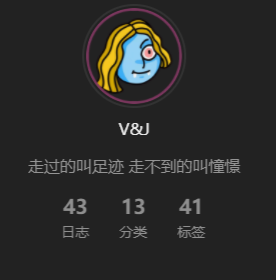
头像设置
头像相关设置在主题配置文件内
1 | avatar: |
上面显示的是博客主要位置头像,如下图
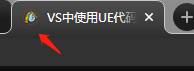
1 | favicon: |
上面代码显示的浏览器比如下图位置显示的头像
反正也没多的准备,都统一用一个了
配置 about、tag、categories菜单
source文件夹中默认只有_posts文件夹, 我们需要手动创建about,tag等文件夹
同时打开next主题配置文件中的所需要的注释,如下
1 | menu: |
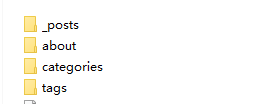
about一般是介绍博主的个人信息和博客信息, ,需要生成一个index.md的文件
可以用如下命令
1 | hexo new page about |
类似的tags和categories也是
上面的404页面我本人没兴趣就没有去设置,有兴趣的朋友可以自己去找相关文档设置一下
本地搜索
我们在主题配置文件中会看到一个local_search关键字,默认enable: false, 我们先把他打开
1 | local_search: |
但是这个还不够, 点击搜索还是没有作用
因为本地搜索还需要插件支持
1 | npm install hexo-generator-searchdb --save |
输入上述命令安装插件
然后在项目配置文件最底下加入如下
1 | # 本地搜索 |
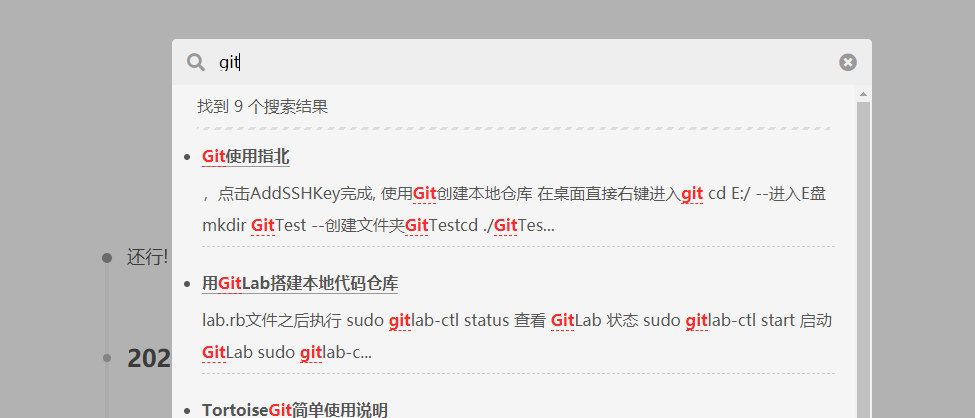
如此完成本地搜索功能
RSS订阅
主题文件底部添加
1 | feed: |
next配置文件打开RSS注释
1 | RSS: /atom.xml || fa fa-rss |
底部版权显示
1 | footer: |
社交信息
1 | social: |
自行开启, 国内用户常用的估计也就前三个了
字数统计等
主题配置中有symbols_count_time:相关字眼
字数显示设置跟老版本有区别, 不要盲目安装老版本插件, 亲测安装以后导致整个博客文件崩坏
按照注释中的说明操作,安装插件
1 | $ npm install hexo-word-counter |
然后复制如下内容到博客配置文件
1 | symbols_count_time: |
另外可以直接打开主题配置中的busuanzi阅读统计
最终效果如下

原创申明
打开主题配置
1 | creative_commons: |
效果如下

添加到google搜索
要添加到搜索引擎,我们先需要生成我们的站点地图文件,先安装插件
1 | npm install hexo-generator-sitemap --save |
然后在博客配置文件中添加
1 | # 自动生成sitemap |
然后生成博客文件
正常情况下在博客public目录下生成了一个sitemap.xml文件,这样就是成功了
然后就需要提交给谷歌,点击这里进行谷歌部分操作
点击添加资源自行添加网站域名
然后在google中输入 site:你的域名测试
打赏
比较简单,打开主题配置文件对应的reward设置,并附上自己的打赏图片
1 | reward_settings: |
代码
代码可以直接设置主题, 可以到这里预览效果
1 | codeblock: |
字体
到谷歌字体查找自己感兴趣的字体
1 | font: |
评论系统
评论系统next支持很多版本, 随意选择自己喜欢的
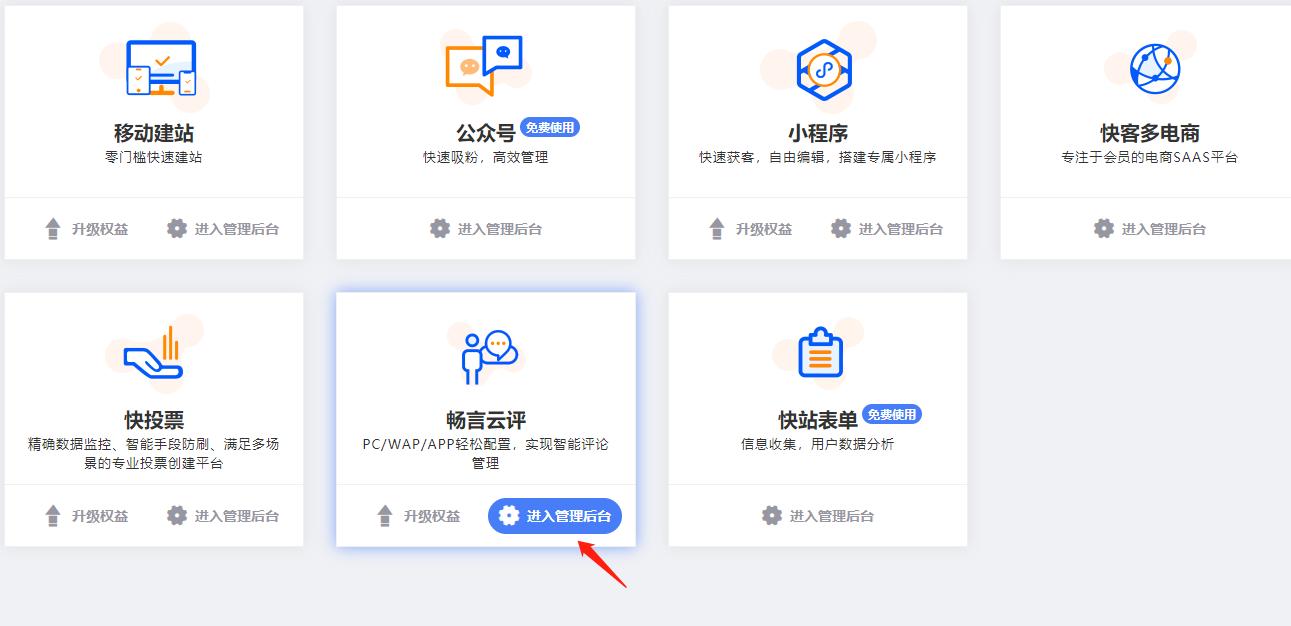
我这里拿Changyan做了测试,使用还算方便
点击官网,进入畅言云评
一路注册进去,最后得到类似下图的代码
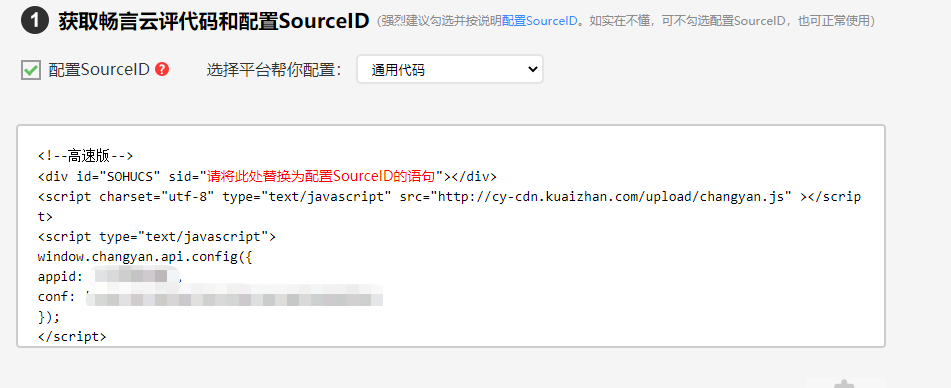
回头看我们next内的代码
1 | changyan: |
发现略微有区别,没事, 我们霸王硬上弓,appid就填上, 把conf内容复制到appkey中
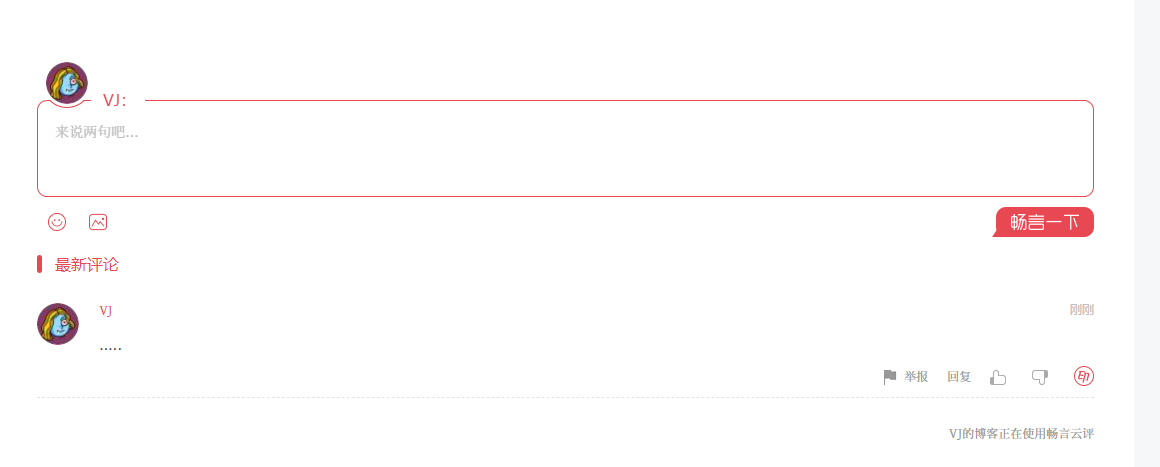
测试完成发现正常工作, 就是评价之前需要登陆一下系统还得绑定手机, 略微麻烦
登录后台发现已有记录

自定义样式
1 | custom_file_path: |
打开博客文件如上注释,同时在博客根目录的source内创建如代码所示文件,此文件是自定义样式的文件
背景图片
1 | body { |
背景颜色
1 | .main-inner { |
边框圆滑
1 | .header-inner { |
代码风格(普通模式的)
- 默认颜色
1 | code { |
- 鼠标选择的颜色
1 |
|
阅读全文按钮
需要配合md文档中给与阅读全文的代码
<!-- more -->
1 | .post-button .btn { |
strong字体
strong字体包括两个星号 和
- 这样的
1 | strong{ |