前言
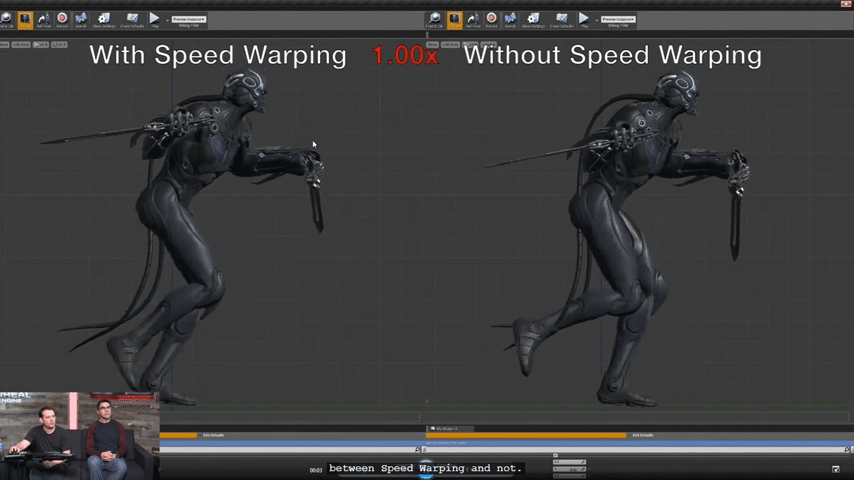
以前我们在处理Locomotion的滑步情况一般都会调整动画速率来达到看上去还凑合的效果, 然而在速度缩放值超过一定范围以后, 展现的情况就非常诡异了, 这个时候就需要通过其他方法来达到这一目的
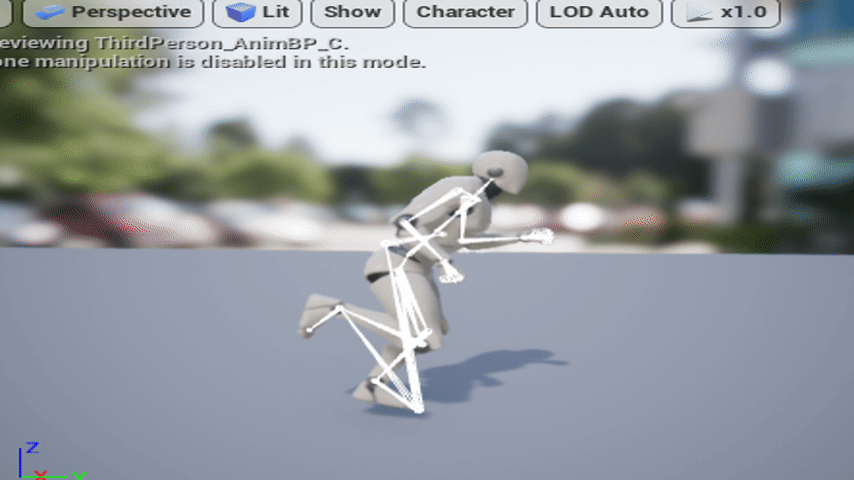
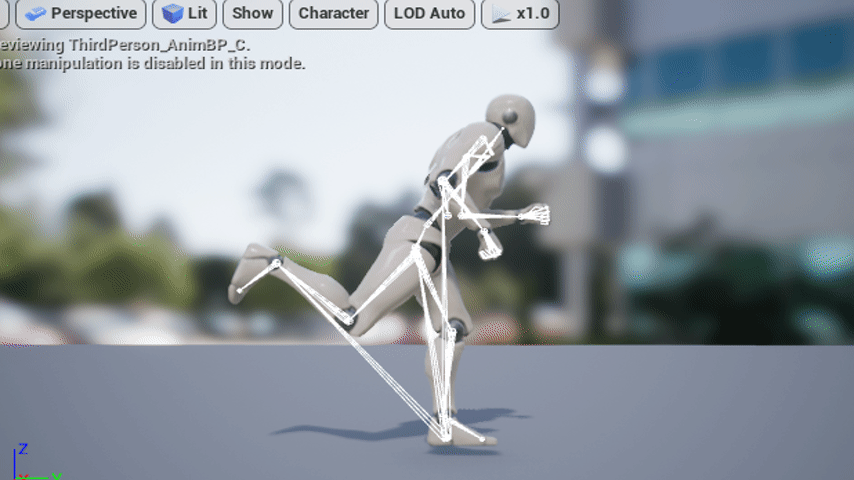
下面是Paragon Feature Examples: Animation Techniques 里面展示的两者的区别
UE5中有一个对应的动画节点FAnimNode_StrideWarping, 但是我发现这个节点有错误(望打脸), 先把他移植到UE4,再慢慢讲
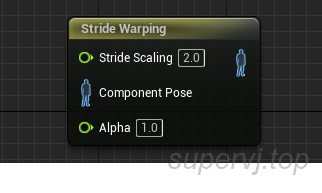
脚步适配(StrideWarping)
从上面的动图可以看到, 脚步适配其实就是让脚步迈的更大/更小来取代动画速率, 那么执行的操作就比较类似用IK来控制脚步的落点的感觉, 但是如果用TwoBone IK来实施起来会发现比较困难, 还是建议到c++中用动画节点来完成
知乎大佬有一篇文章用Control Rig来模拟这个过程, 实际上效果会有点差别, 在步伐放大以后的效果比较差
传送门
一句话概括脚步适配的计算
脚步位置 = 初始的位置 + 初始的位置沿着脚步平面运动方向的偏移 * 缩放值
看一下FAnimNode_StrideWarping节点的参数
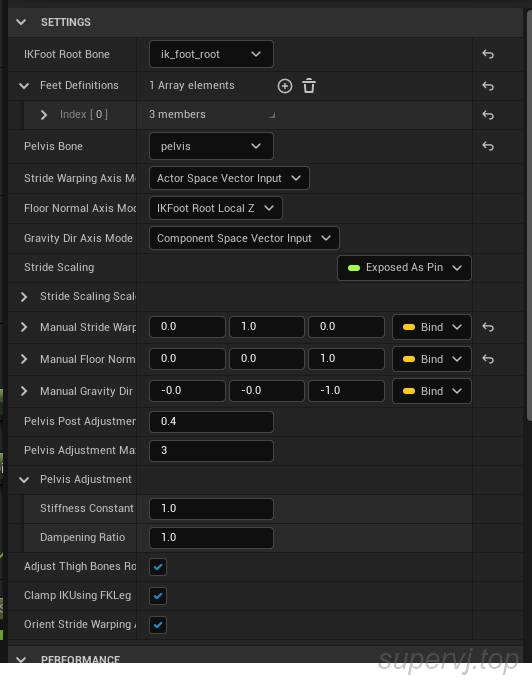
参数比较多, 而且没有注释, 果然只是beta版本
在动画蓝图模式下调试此节点的CMD命令是 a.AnimNode.StrideWarping.Debug 1
脚步缩放
下面这段代码在我看来有问题
1
2
3
4
5
6
7
8
9
|
const FVector StrideWarpingPlaneOrigin = (FMath::Abs(GravityDir | FloorPlaneNormal) > DELTA) ? FMath::LinePlaneIntersection(HipBoneLocation, HipBoneLocation + GravityDir, IKFootLocation, FloorPlaneNormal) : IKFootLocation;
const FVector ScaleOrigin = FVector::PointPlaneProject(IKFootLocation, StrideWarpingPlaneOrigin, StrideWarpingPlaneNormal);
const FVector WarpedLocation = ScaleOrigin + (IKFootLocation - ScaleOrigin) * ActualStrideScaling;
FootData.IKBoneTransform.SetLocation(WarpedLocation);
|
按照我的理解,我们的目的是根据foot_l骨骼的位置变换来设置ik_foot_l的实时位置, 那么上面代码的StrideWarpingPlaneOrigin做的是大腿顶部的位置投影到IK平面, 这个可以有, 然后把IK骨骼位置投影到适配的平面作为起始点, 这个也可以理解, 那么(IKFootLocation - ScaleOrigin)这个操作就有点不理解了, 这俩位置都是固定, 是否应该把IKFootLocation 改成FKFootLocation ?
那么先按照现有的代码配置FeetDefinitions参数的时候, 理所当然的想到是这样设置的

然而如何尝试都是原地踏步运动, 看下图的右腿
于是, 重点来了, 手动魔改了一下代码
首先FStrideWarpingFootData加了一个FK位置信息的成员变量
1
2
3
4
5
6
7
8
9
10
11
| struct FStrideWarpingFootData
{
GENERATED_USTRUCT_BODY()
FCompactPoseBoneIndex IKFootBoneIndex;
FCompactPoseBoneIndex FKFootBoneIndex;
FCompactPoseBoneIndex HipBoneIndex;
FTransform IKBoneTransform;
FTransform FKBoneTransform;
};
|
然后就是主要计算部分
1
2
3
4
5
6
7
8
9
10
11
12
13
14
15
16
17
18
19
20
| for (auto& FootData : FeetData)
{
const FVector IKFootLocation = FootData.IKBoneTransform.GetLocation();
const FVector FKFootLocation = FootData.FKBoneTransform.GetLocation();
const FVector HipBoneLocation = Output.Pose.GetComponentSpaceTransform(FootData.HipBoneIndex).GetLocation();
FVector StrideWarpingPlaneOrigin = (FMath::Abs(GravityDir | FloorPlaneNormal) > DELTA) ? FMath::LinePlaneIntersection(HipBoneLocation, HipBoneLocation + GravityDir, FKFootLocation, FloorPlaneNormal) : IKFootLocation;
const FVector ScaleOrigin = FVector::PointPlaneProject(FKFootLocation, StrideWarpingPlaneOrigin, StrideWarpingPlaneNormal);
FVector WarpedLocation;
WarpedLocation.Y = ScaleOrigin.Y + (FKFootLocation- ScaleOrigin).Y * ActualStrideScaling;
WarpedLocation.Z = FKFootLocation.Z;
WarpedLocation.X = FKFootLocation.X;
FootData.IKBoneTransform.SetLocation(WarpedLocation);
FootData.IKBoneTransform.SetRotation(FootData.FKBoneTransform.GetRotation());
}
|
得到结果
效果还可以, pelvis位置校正的那一块沿用了旧的代码
盆骨校正
因为只缩放脚步, 步子迈的大了, pelvis位置必然会需要下降, 不然人要不就腾空, 要不就脚步被IK拉直了, 这里大致思路就是利用脚步位置到盆骨位置的距离值来校正盆骨位置
1
2
3
4
5
6
7
8
9
10
11
12
13
14
15
16
17
18
| FVector AdjustedPelvisLocation = InitialPelvisLocation;
{
check(IKFeetLocation.Num() > 0);
const float PerFootWeight = (1.f / float(IKFeetLocation.Num()));
int32 Iterations = FMath::Clamp(PelvisAdjustmentMaxIter, 1, 10);
while (Iterations-- > 0)
{
const FVector PreAdjustmentLocation = AdjustedPelvisLocation;
AdjustedPelvisLocation = FVector::ZeroVector;
for (int32 Index = 0; Index < IKFeetLocation.Num(); Index++)
{
const FVector IdealPelvisLoc = IKFeetLocation[Index] + (PreAdjustmentLocation - IKFeetLocation[Index]).GetSafeNormal() * FKFeetDistToPelvis[Index];
AdjustedPelvisLocation += IdealPelvisLoc * PerFootWeight;
}
}
}
|
上面代码简单理解为 pelvis骨骼朝着两个脚步骨骼偏移以后取平均
然后是做一个插值计算
1
2
3
4
5
| const FVector TargetAdjustment = (AdjustedPelvisLocation - InitialPelvisLocation);
PelvisAdjustmentInterp.Update(TargetAdjustment, CachedDeltaTime);
const FVector SmoothAdjustedPelvisLocation = InitialPelvisLocation + FMath::Lerp(FVector::ZeroVector, PelvisAdjustmentInterp.GetPosition(), PelvisPostAdjustmentAlpha);
PelvisTransform.SetLocation(SmoothAdjustedPelvisLocation);
|
对比一下有没有偏移的效果
靠后靠下一点的是应用了盆骨偏移的
大腿骨校正
盆骨偏移了以后, 那么大腿骨也要跟着偏移一下, 不然姿势就会变得非常奇怪, 利用从盆骨得到的偏移量应用到大腿骨
1
2
3
| AdjustedHipTransform.AddToTranslation(PelvisOffset);
AdjustedHipTransform.SetRotation(DeltaRotation * AdjustedHipTransform.GetRotation());
|
因为旋转了大腿骨, 所以在不适用脚步IK的情况下也可以有比较好的表现
总结
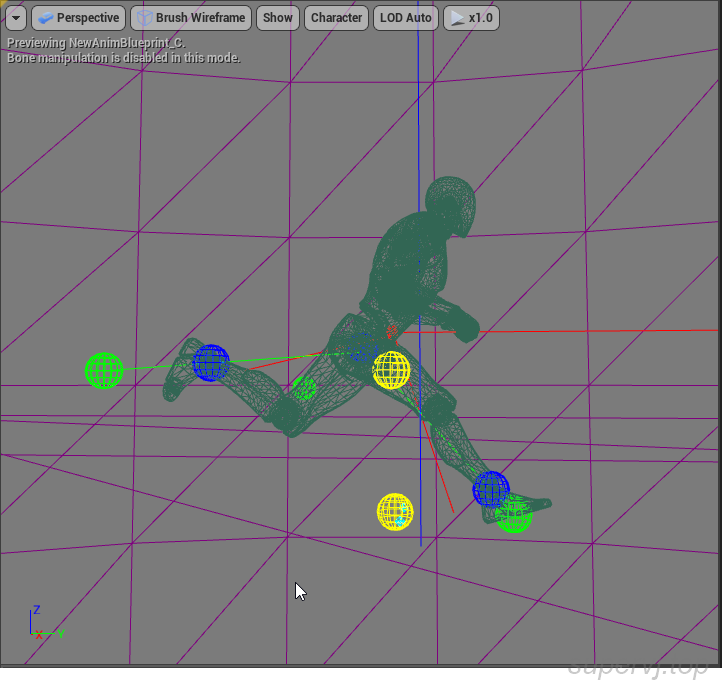
上图是开启了debug模式的所有debug图形
先看两条线
- 绿色线表示的是IK骨骼到校正后的大腿骨的连线
- 红色线是FK骨骼到校正之前的大腿骨的连线
然后看盆骨附近的连城一条线的3个球
- 红色球表示盆骨默认位置
- 绿色是计算后的
AdjustedPelvisLocation位置
- 蓝色是插值以后的中间值
中轴线上的2个黄色球表示脚步适配的起始点位置
其他方案
虚幻商城还有其他第三方的插件也实现了脚步适配效果, 个人觉得Strider - Animation Warping是个可行方案, 不过需要搭配脚步IK使用
效果如下
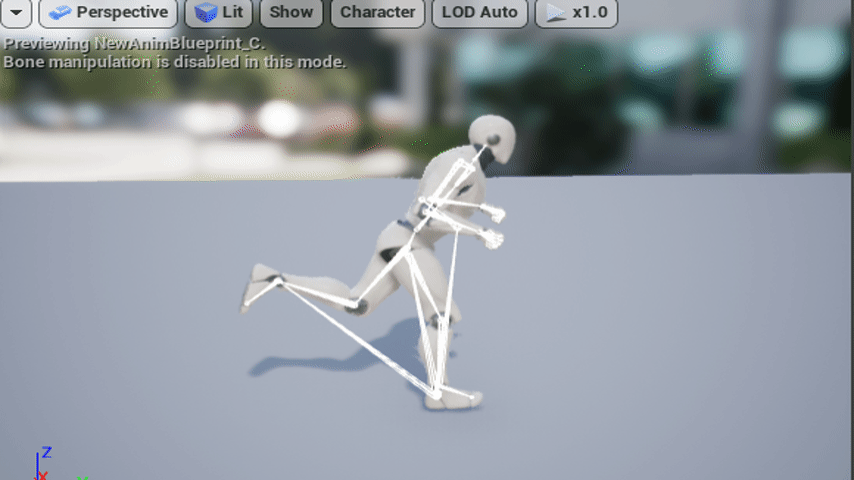
在缩放大于1.5的时候有点奇怪
还有免费的过期好久的插件Custom Speed & Orientation Warping
原理都差不多, 无非就是算法有区别, 不过这个插件我试了一下也是有问题的, 不想细究了, 谁有兴趣谁去整一波